Projector throw distance is the space between your projector and the screen, which determines how big and clear your image will be. The right distance depends on your projector’s throw ratio and desired screen size. Shorter distances produce smaller images, while longer ones create larger visuals. Proper measurement and understanding of throw ratios help you place your projector correctly. Keep exploring to discover how to set it up perfectly for your space.
Key Takeaways
- Throw distance is the space between the projector and the screen, affecting the image size and clarity.
- The throw ratio determines how far the projector must be to produce a specific image width.
- Short-throw projectors can create large images from close distances, ideal for small rooms.
- Longer throw projectors require more space but can project larger images at greater distances.
- Proper planning of throw distance ensures optimal image quality, size, and room setup.
What Is Throw Distance and Why Is It Important?
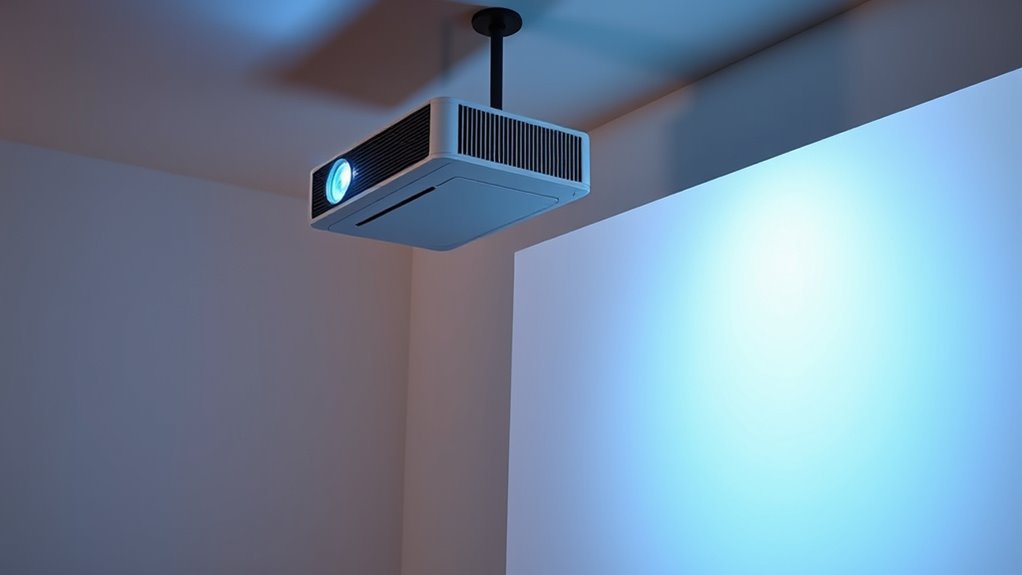
Have you ever wondered why some projectors can fill a large screen while others struggle to produce a clear image at the same distance? That’s where throw distance comes in. Throw distance is the space between your projector and the screen, which determines how big the image will be. It’s important because it affects image quality, setup flexibility, and room layout. If your projector has a short throw, you can place it close to the wall and still get a large picture. Conversely, a long-throw projector needs more space to produce the same size image. Understanding throw distance helps you choose the right projector for your space, ensuring the image is sharp, properly sized, and free from distortion. Proper planning makes your viewing experience much more enjoyable. Additionally, knowing the navigation and mapping capabilities of modern projectors can assist in optimal placement and image adjustment.
Furthermore, considering the contrast ratio of the projector can enhance the perceived image quality in your setup. Recognizing the importance of throw ratio can also aid in selecting the most suitable projector based on your room’s dimensions. A thorough understanding of energy efficiency features can also contribute to more sustainable and cost-effective usage over time.
How to Measure Throw Distance in Your Space

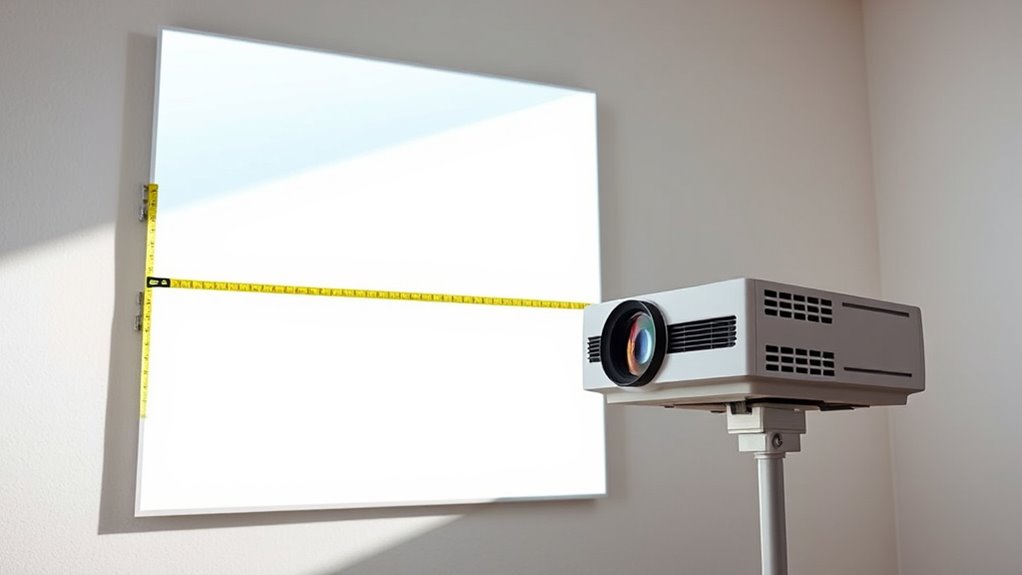
Measuring the throw distance in your space begins with identifying the exact location where you want to position your projector and the size of the image you desire. First, determine the ideal placement spot, considering factors like ceiling height or table position. Then, measure the horizontal distance from that spot to the screen or wall where the image will be projected. Use a tape measure for accuracy, noting this length as your throw distance. Keep in mind that any obstructions or furniture in the way can affect placement. Additionally, considering the luggage & bags you bring can help streamline setup and avoid clutter during installation. Recording these measurements accurately is crucial for selecting the right projector and setup. Be sure to double-check your measurements before purchasing or installing to ensure the projected image fits perfectly within your space. Additionally, understanding the throw ratio of your projector can help you determine the appropriate distance for different screen sizes. Knowing the projector specifications can further assist in optimizing your setup for the best viewing experience. Moreover, paying attention to the ambient lighting in your space can significantly impact the clarity and quality of the projected image.
Understanding Throw Ratio and Its Role in Projection Size

Understanding the throw ratio of your projector helps you predict the size of the image at a given distance. The throw ratio is a simple number that relates your projector’s distance to the width of the projected image. For example, a throw ratio of 1.5 means that for every 1.5 feet of distance, your image will be 1 foot wide. A lower throw ratio produces larger images at shorter distances, making it ideal for small spaces. Conversely, a higher throw ratio requires more distance to achieve the same size. By knowing your projector’s throw ratio, you can plan where to place it to get the desired image size without guesswork. This understanding helps you optimize your setup and avoid issues like a too-small or overly large projection. Additionally, understanding air quality and how to improve it can enhance your viewing environment, making your projection experience more comfortable and enjoyable. Being aware of the projector’s specifications ensures you select the right model for your space and needs. Understanding how light conditions affect your projection can further improve image clarity and contrast. Moreover, considering the projection surface can significantly impact the overall picture quality and viewing experience. Knowing the throw distance requirements also helps you plan your room layout more effectively.
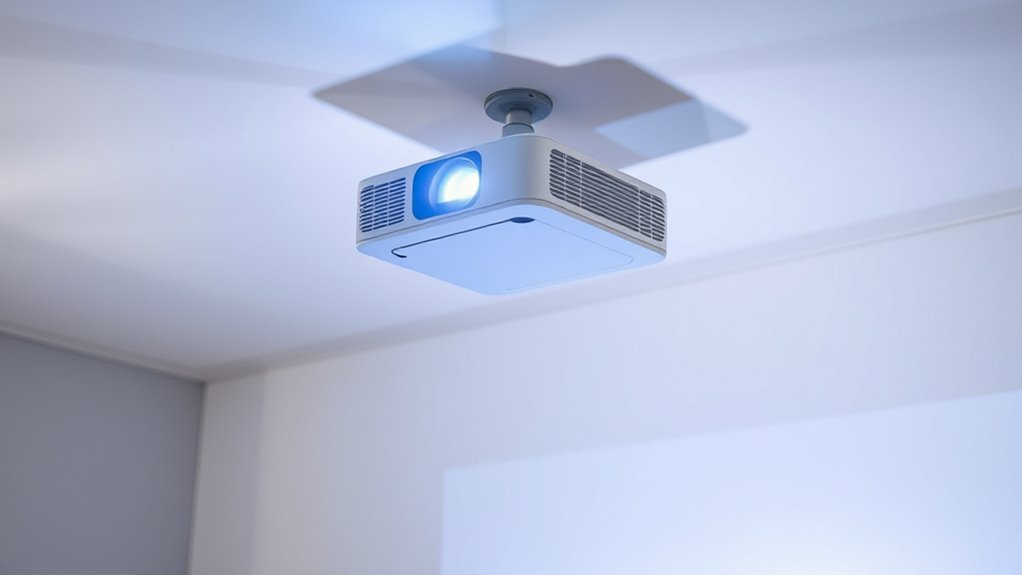
Different Types of Projectors and Their Throw Distance Needs
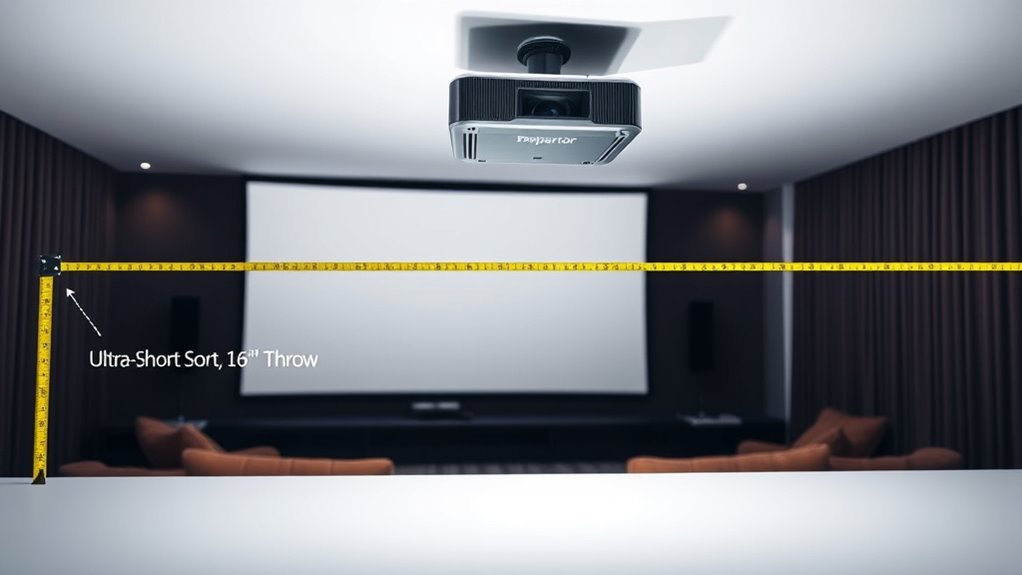
Different types of projectors have unique throw distance requirements that can substantially impact your setup choices. Understanding these differences helps you select the right projector for your space and guarantee ideal image size and quality. Short-throw projectors need only a small distance from the screen, making them ideal for limited spaces or close-up installations. Standard projectors require more distance to produce a large image, suitable for larger rooms. Ultra-short-throw projectors can sit almost directly against the wall while projecting a big picture, perfect for small rooms or interactive displays. Here are some key types to think about:
- Short-throw projectors
- Standard throw projectors
- Ultra-short-throw projectors
- Long-throw projectors
Additionally, understanding the plant properties of the various projector types can help optimize your setup for clarity and durability. Being aware of throw ratio details can also assist in selecting the most appropriate projector for your specific space constraints. Knowing the suitable environments for each type ensures you choose a projector that performs well in your intended setting. Recognizing the importance of auditory processing and sound requirements can be beneficial if your setup includes integrated audio components. Moreover, considering smart integration features can enhance the overall user experience by enabling seamless control and automation.
Calculating the Optimal Placement for Your Projector

To find the best spot for your projector, start by measuring your room’s dimensions accurately. Use the manufacturer’s throw ratio to determine the ideal distance based on your screen size. Once you have these numbers, you can adjust the projector’s placement for the clearest image and most favorable viewing experience. Additionally, considering the networking hardware placement can help ensure your setup is both efficient and accessible. Proper placement can also prevent potential color distortion, ensuring your image remains vibrant and true to life. Being mindful of ambient light levels in the room can further enhance your viewing quality and reduce glare. Incorporating quality assurance practices can also help verify that your setup performs optimally over time. Evaluating the room’s layout can help optimize the overall viewing experience and minimize obstructions.
Measuring Room Dimensions Accurately
Accurately measuring your room dimensions is essential for determining the most suitable projector placement. Knowing the exact width, length, and height helps you identify the ideal distance between the projector and screen, ensuring a clear, focused image. Use a reliable tape measure or laser distance tool for precise results. Take multiple measurements at different points to account for irregularities or obstructions. Record these dimensions carefully so you can compare them with your projector’s throw ratio and screen size. Remember, accurate room measurements prevent surprises when setting up your projector and help you achieve optimal (alternative: best) picture quality. Incorporating seasonal checklists can also help maintain your setup and optimize performance over time.
Using Manufacturer’s Throw Ratio
Understanding your projector’s throw ratio is key to determining the ideal placement. The throw ratio is a simple number that tells you how wide your image will be relative to the distance from the projector to the screen. For example, a throw ratio of 1.5:1 means that for every 1.5 feet of distance, your image will be 1 foot wide. To find the best position, check your projector’s specifications for its throw ratio. Then, divide your desired image width by that ratio. This calculation gives you the approximate distance to place your projector. Using the manufacturer’s throw ratio guarantees accurate placement, helping you avoid image distortion or inadequate size, and simplifies the setup process.
Adjusting for Screen Size
Ever wonder how to perfectly position your projector based on your screen size? To get the best image quality and fit, you need to modify your projector’s placement accordingly. First, measure your screen’s width and height to determine the ideal image size. Then, use the projector’s throw ratio to calculate the distance needed for that size. Remember, a larger screen requires the projector to be farther back, while a smaller screen means closer placement. Keep these tips in mind:
- Match your screen size with your projector’s recommended throw ratio
- Use a calculator or formula to find the finest distance
- Consider room layout and available space
- Adjust the projector’s position to center the image for even projection
Being precise ensures a clear, properly scaled picture without distortion.
Factors That Affect Throw Distance and Image Quality
Several factors directly influence both the throw distance and the image quality of a projector. These include the projector’s lens, brightness, resolution, and ambient lighting conditions. A high-quality lens offers sharper images and better focus over various distances. Brightness, measured in lumens, impacts visibility; too low, and images appear dim, especially at longer distances. Resolution determines image clarity, with higher resolutions maintaining detail regardless of throw distance. Ambient lighting can wash out images if not controlled. Here’s a quick overview:
| Factor | Effect on Throw Distance | Effect on Image Quality |
|---|---|---|
| Lens Quality | Affects focus and sharpness | Improves clarity and detail |
| Brightness | Maintains visibility at longer distances | Ensures vibrant images |
| Resolution | Less affected by distance | Higher resolution maintains quality regardless of distance |
Tips for Adjusting Your Projector for the Perfect Fit
To get the best image, you’ll want to master keystone correction techniques to straighten any distorted edges. Proper screen placement also makes a big difference, ensuring your projector is aligned for ideal viewing. With some quick adjustments, you can achieve a perfect fit that enhances your overall viewing experience.
Keystone Correction Techniques
Keystone distortion occurs when your projector is placed at an angle, causing the image to appear trapezoidal rather than rectangular. To fix this, use keystone correction to straighten the image. Many projectors have manual or digital keystone correction features. Start by adjusting the projector’s position to minimize distortion before relying on correction tools. Use the correction buttons to fine-tune the image’s shape, but avoid excessive adjustments, which can reduce image quality. Keep in mind that digital correction may slightly degrade resolution. For best results, position your projector as perpendicular to the screen as possible.
- Use physical adjustments first before digital correction
- Make small corrections to preserve image quality
- Check your projector’s manual for specific keystone controls
- Combine keystone correction with proper placement for best results
Optimal Screen Placement
Achieving the perfect image requires careful placement of your projector relative to the screen. Start by measuring the ideal distance based on your projector’s throw ratio, ensuring the image size matches your space. Position the projector on a stable surface or mount it securely, avoiding obstructions that could block the lens. Keep the projector level and aligned with the center of the screen to prevent keystone distortion. Adjust the height so the lens is at or slightly above the bottom of the screen for a seamless picture. Remember that larger screens require the projector to be placed farther away, while smaller screens need closer placement. Regularly check focus and alignment, making small adjustments until the image fits perfectly within the screen boundaries for the best viewing experience.
Common Mistakes to Avoid When Setting Up Throw Distance

One of the most common mistakes when setting up your projector’s throw distance is ignoring the manufacturer’s recommended specifications. This can lead to poor image quality, such as blurriness or distortion, and may even damage the projector. To avoid this, carefully review your projector’s manual or datasheet.
Ignoring manufacturer’s throw distance specs risks poor image quality and potential damage—always review your projector’s manual.
Be mindful of these pitfalls:
- Placing the projector too close or too far from the screen
- Forgetting to account for lens shift or zoom capabilities
- Overlooking room lighting conditions that affect image visibility
- Not testing the setup before finalizing the installation
Tools and Resources to Help Determine Your Ideal Throw Distance
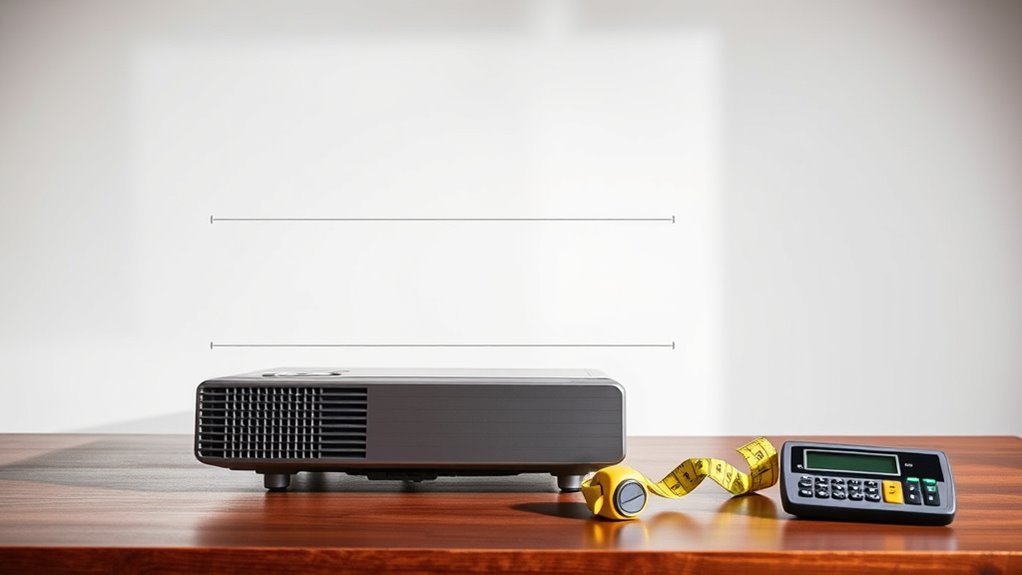
To accurately determine your ideal throw distance, leverage a variety of practical tools and resources designed to simplify the setup process. A projector calculator app can quickly provide recommended distances based on your projector model and screen size. Measuring tapes or laser distance meters help you precisely mark the most suitable placement spot, ensuring accuracy. Many projector brands offer online setup guides and printable templates that give you step-by-step instructions tailored to your device. Additionally, manufacturer websites often feature specifications and throw ratio charts, making it easier to plan your setup. Using these tools saves time, reduces guesswork, and guarantees your projector is positioned for ideal image quality. Combining these resources helps you achieve the perfect projection setup with confidence and ease.
Frequently Asked Questions
Can Throw Distance Impact the Projector’s Lifespan?
Yes, the throw distance can impact your projector’s lifespan. When you place the projector too close or too far from the screen, it may cause overheating or strain on the internal components. Maintaining the recommended throw distance guarantees proper cooling and prevents unnecessary wear. By following the manufacturer’s guidelines, you’ll help extend your projector’s life and enjoy maximum performance over time.
How Does Ambient Light Influence Optimal Throw Distance?
Ambient light affects your ideal throw distance because brighter rooms require the projector to be closer to produce a clear, vivid image. When there’s more ambient light, you should reduce the throw distance to avoid washed-out visuals. Conversely, in darker environments, you can increase the distance for a larger image without sacrificing quality. Adjusting your throw distance based on room lighting ensures you get the best picture quality.
Are There Projectors With Adjustable Throw Distances?
Yes, many projectors have adjustable throw distances. You can manually or electronically change the lens position to suit different room sizes or projection needs. Some high-end models feature motorized zoom and focus controls, making it easy to fine-tune the image size without moving the projector. This flexibility allows you to optimize image clarity and size, even if your setup space or screen distance changes.
What Safety Considerations Are Involved in Projector Placement?
Sure, safety is a breeze—just don’t trip over the power cord or place the projector where it could fall on someone. Make sure it’s stable, away from water and heat sources, and the cables are neatly managed. Keep the projector’s ventilation clear to prevent overheating. And of course, avoid pointing it directly at someone’s eyes. Easy safety tips that keep your viewing party safe and sound!
Can Wall Color Affect the Effective Throw Distance?
Yes, wall color can affect the effective throw distance of your projector. Light-colored or white walls reflect more light, making the image brighter and clearer at a closer distance. Darker walls absorb light, requiring you to place the projector farther away to achieve ideal image quality. To improve performance, consider using a neutral or light-colored screen or wall, and adjust your projector’s placement accordingly for the best viewing experience.
Conclusion
Getting your projector’s throw distance just right is key to a perfect display. Measure carefully, consider your projector’s type, and adjust accordingly to avoid common pitfalls. Remember, “measure twice, cut once” — taking the time to set up properly saves you headaches later. With the right tools and knowledge, you’ll create a stunning projection every time. So, don’t rush; your ideal setup is just a few steps away!