
Before cleaning, perform a simple water test to determine if your surface is sealed or unsealed. Place a small water drop on the area and watch how it reacts. If the water beads up, your surface is sealed and safe to clean with gentle, pH-neutral cleaners. If it soaks in or spreads out, the surface is unsealed and needs different care. Keep going to discover tips for proper maintenance and protection.
Key Takeaways
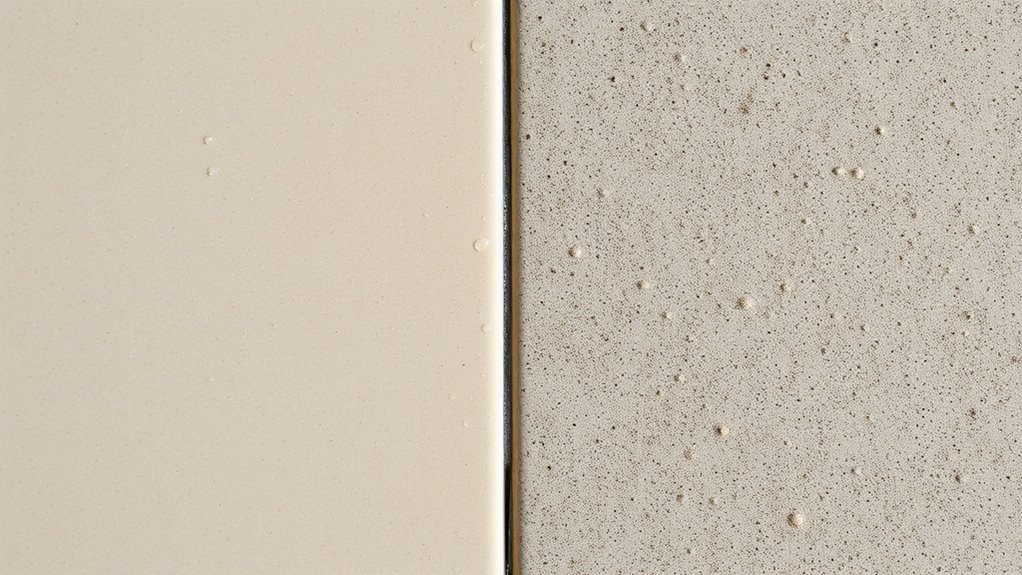
- Conduct a water test by placing a small droplet on the surface to observe how it reacts.
- Beading water indicates a sealed, water-resistant surface; spreading shows an unsealed, porous surface.
- Test on a hidden area first, waiting 10-15 minutes before rinsing to check for discoloration or damage.
- Re-test periodically to monitor surface condition and determine if resealing or maintenance is needed.
- Always use gentle, pH-neutral cleaners after confirming surface type to prevent damage.

Zep Neutral PH Industrial Floor Cleaner – 1 Gallon – ZUNEUT128 – Concentrated Pro Trusted All-Purpose Floor Cleaner
Maintains polish without stripping protective coating
As an affiliate, we earn on qualifying purchases.
As an affiliate, we earn on qualifying purchases.
Why Knowing the Surface Type Matters

Understanding whether a surface is sealed or unsealed is essential because it directly impacts how you clean, maintain, and protect it. Sealed surfaces have a protective layer that repels water and stains, making cleaning easier and preventing damage. Unsealed surfaces absorb liquids, dirt, and debris, which can lead to staining, erosion, or deterioration if not properly maintained. Knowing the type helps you choose the right cleaning products and methods. Using the wrong cleaner on an unsealed surface can cause harm, while applying sealers on a sealed surface might trap dirt or create a dull appearance. Recognizing the difference ensures you preserve the surface’s integrity, extend its lifespan, and avoid costly repairs. Proper identification is the first step toward effective, safe maintenance. European cloud innovation promotes sustainable and secure solutions that can support long-term surface management practices. Additionally, understanding surface properties can benefit from insights into nanotechnology advancements that enhance protective coatings and cleaning techniques. Developing surface analysis techniques can further aid in correctly identifying surface types before cleaning or sealing. Accurate surface identification is also crucial for preventive maintenance, helping to reduce the need for costly repairs down the line.

Varify 17in1 Complete Drinking Water Test Kit – 100 Strips + 2 Bacteria Tester Kits – Well, Tap, Home, City Water Testing Strip for Lead, Alkaline, Chlorine, Hardness, Iron, Fluoride, Copper & More
17 IMPORTANT PARAMETERS: The Varify Premium Drinking Water Test Kit offers an unrivaled, complete analysis of your drinking…
As an affiliate, we earn on qualifying purchases.
As an affiliate, we earn on qualifying purchases.
Materials Commonly Found as Sealed or Unsealed
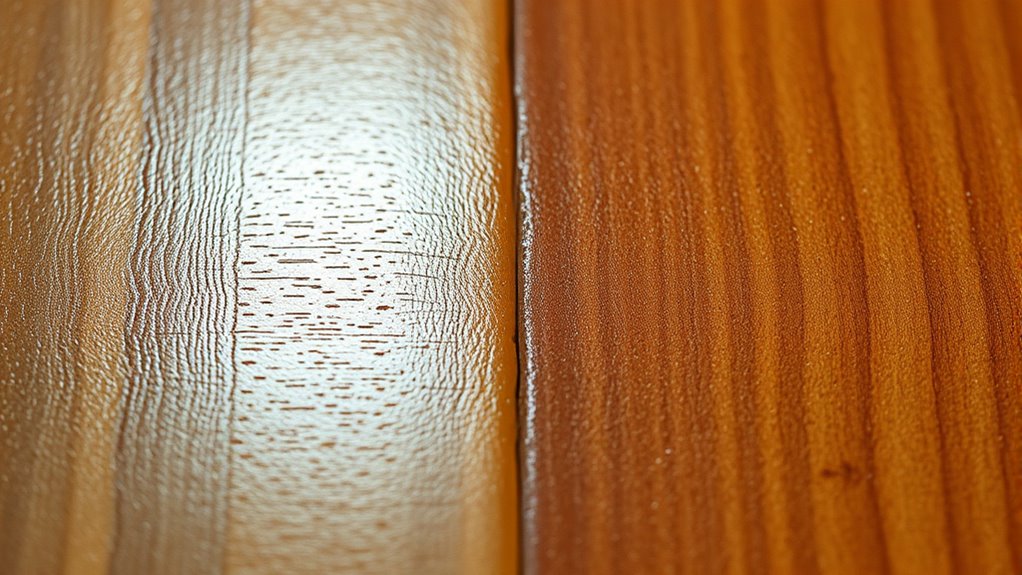
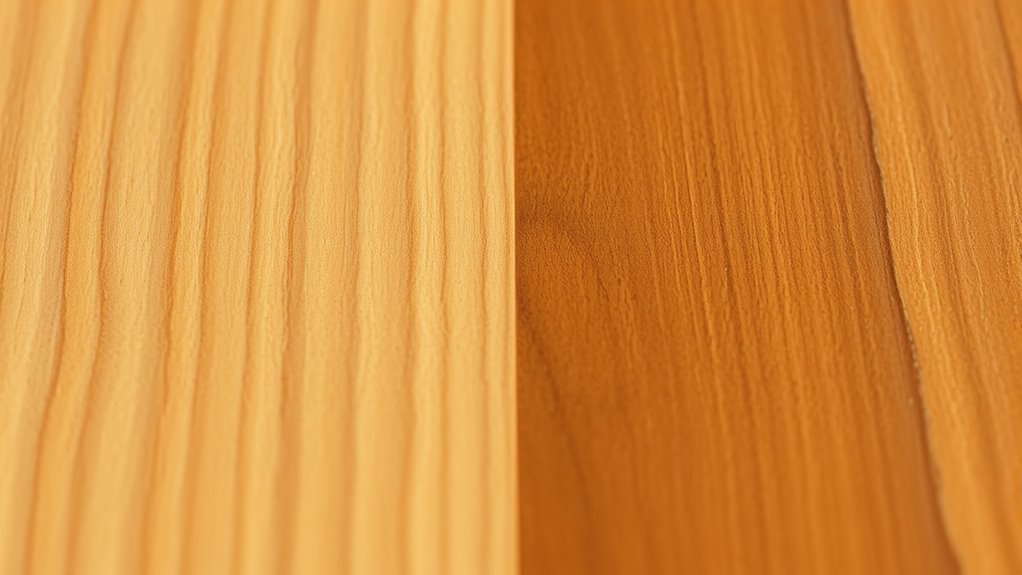
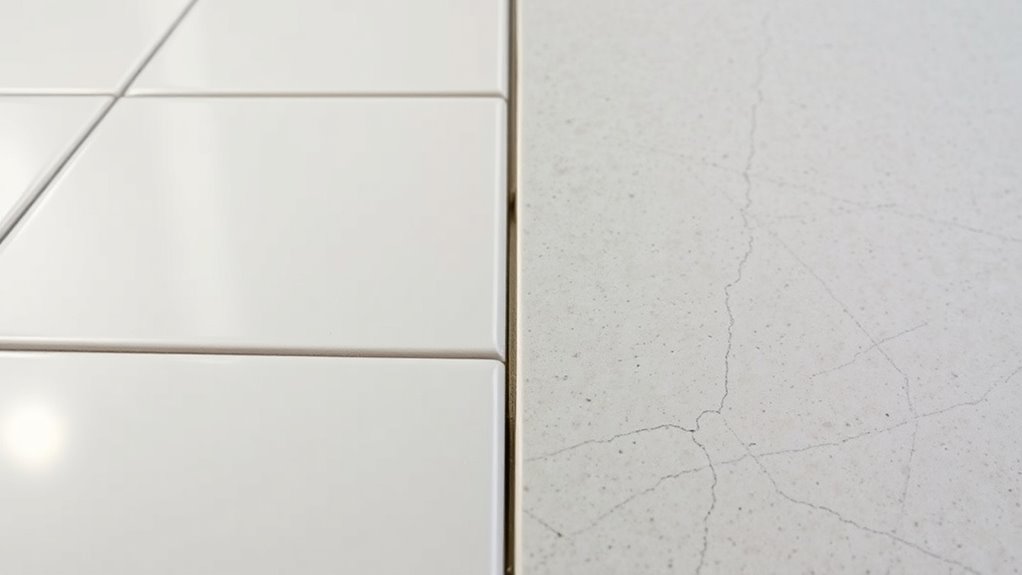
Many common building materials can be found as either sealed or unsealed, depending on their purpose and finish. For example, stone and wood are often sealed to prevent damage and staining, while concrete and brick are typically unsealed for breathability. Sealed surfaces usually have protective coatings, making them more resistant to liquids and stains. Unsealed surfaces, on the other hand, tend to absorb moisture and dirt, which can lead to deterioration or discoloration over time. Here’s a quick overview:
| Material | Usually Sealed | Usually Unsealed |
|---|---|---|
| Stone | Yes | No |
| Wood | Yes | No |
| Concrete | No | Yes |
| Brick | No | Yes |
| Ceramic Tile | Yes | No |
Knowing these distinctions helps you choose the right cleaner and maintenance approach.

Miracle Sealants 511 Impregnator Advanced Penetrating Sealer for Countertops, Stone, Tile & Grout, Pint
For use inside or out on a variety of surfaces including sanded grout, ceramic tile, porcelain tile, glazed…
As an affiliate, we earn on qualifying purchases.
As an affiliate, we earn on qualifying purchases.
The Simple Water Test Step-by-Step
To test your surface, start by placing a single water drop on it. Watch how the water reacts—does it bead up or spread out? This will help you identify whether the surface is sealed or unsealed. Knowing the surface type can also guide you in choosing the most appropriate cleaner and routine for maintenance surface identification.
Prepare a Water Drop
Before testing a surface, gather a clean, dry dropper or a small spoon to carefully place a single drop of water. Make sure your tool is free of any dirt or residue to prevent contamination. Hold the dropper or spoon steady, and gently release one drop of water onto the surface you want to test. Aim for a small, round droplet that stays in place without spreading out too much. This precise placement is *essential* for an accurate test. Avoid touching the water with your fingers or other objects, as oils or dirt can affect the results. Once the drop is in place, you’re ready to observe how the water interacts with the surface, which will tell you if it’s sealed or unsealed.
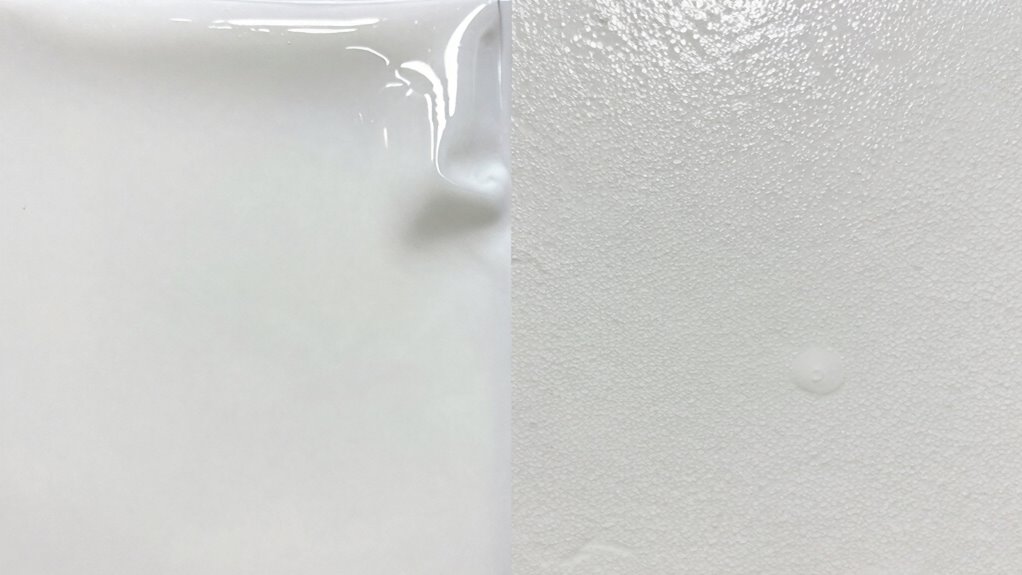
Observe Surface Reaction
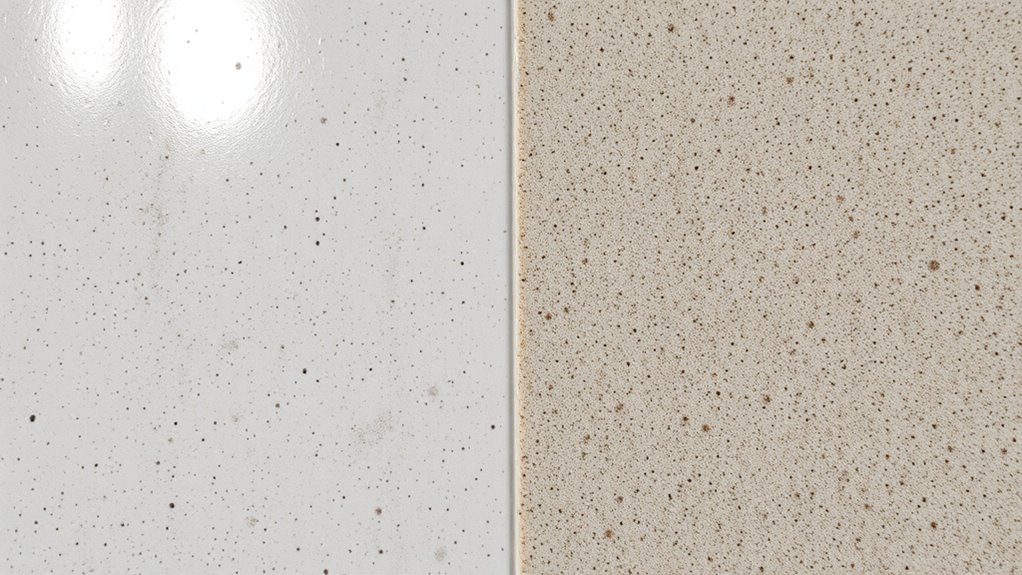
Once you’ve placed the water drop on the surface, observe how it reacts. A sealed surface will cause the water to bead up, forming tight, round droplets that sit on top. An unsealed surface, however, will absorb the water, spreading it out or creating a dull, matte spot. This reaction tells you whether the surface is protected or porous. Use the table below to interpret your results:
| Reaction | Surface Type |
|---|---|
| Beads up | Sealed, water-resistant surface |
| Spreads out | Unsealed, porous surface |
| Dull spot | Unsealed, absorbs water |
| Tight droplets | Sealed, repels water |
| Dissolves or soaks in | Unsealed, porous |
This simple test helps you decide your next cleaning or sealing step effectively. Also, understanding the surface properties can guide you in choosing the right maintenance method to preserve your surfaces.
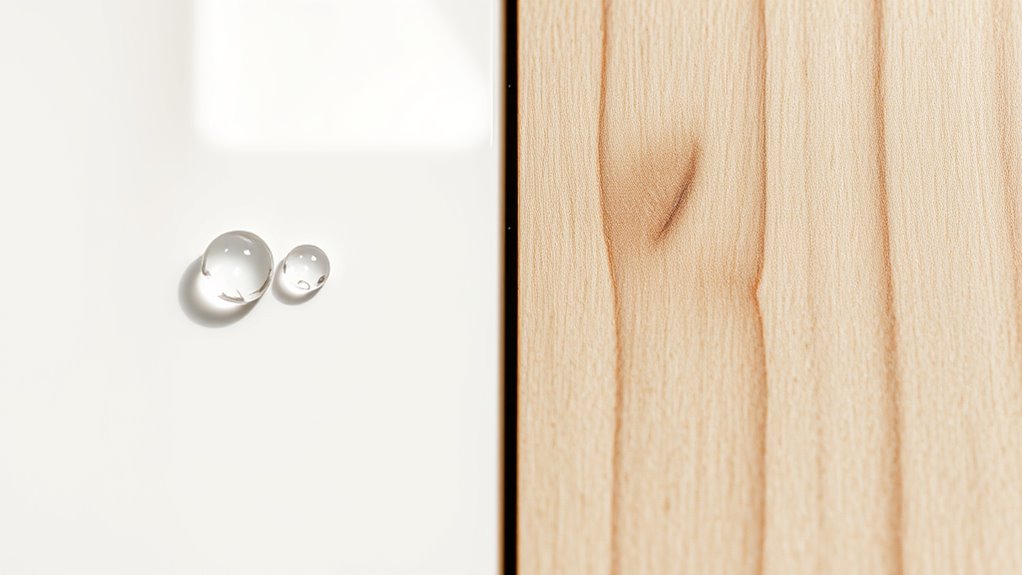
Determine Sealant Type
Determining the type of sealant on a surface is straightforward if you perform the water test correctly. First, pour a small amount of water onto the area in question. Watch how it reacts: if the water beads up into droplets, your surface is likely sealed with a hydrophobic coating. If the water soaks in quickly or spreads out evenly, it’s probably unsealed or has a porous sealant. Take note of the water’s behavior after a few minutes. Beading indicates a sealed surface, while absorption suggests unsealed or porous sealants. This simple test helps you decide whether you need to clean or reseal, preventing damage from using the wrong cleaner. Always perform this test in a small, inconspicuous area first. Understanding sealant properties can help you interpret the results more accurately.
303 Products Marine Aerospace Protectant – UV Protection – Repels Dust, Dirt, & Staining – Smooth Matte Finish – Restores Like-New Appearance – 10 Fl. Oz. (30305)
Ultimate Protection – Superior protection against UV rays, dust, dirt, salt water, and staining keeps your products looking…
As an affiliate, we earn on qualifying purchases.
As an affiliate, we earn on qualifying purchases.
Interpreting the Results of the Water Test

Interpreting the results of a water test provides valuable insights into the condition of your surface, whether sealed or unsealed. If water beads up and stays on the surface, it indicates a sealed surface, meaning the protective layer is intact. This suggests you can proceed with cleaning without worrying about damaging the material. If the water soaks in quickly or leaves dark spots, your surface is unsealed or has worn sealant. In that case, you should use gentler cleaning methods and possibly reseal the surface afterward. Pay attention to how water reacts during the test; it’s the key to choosing the right cleaning approach. Proper interpretation helps prevent damage and extends the life of your surface, saving you time and money in the long run.
How to Protect Sealed Surfaces During Cleaning
To safeguard your sealed surfaces during cleaning, start by using gentle cleaners that won’t damage the seal. Avoid harsh chemicals like bleach or ammonia, which can weaken the surface over time. Always test a small, hidden area first to ensure the cleaner won’t cause any harm before applying it broadly. Additionally, choosing smart appliances that are compatible with delicate surfaces can help maintain their integrity during routine cleaning. Using non-abrasive tools when cleaning can further prevent scratches and preserve the surface’s protective layer. Being mindful of heat resistance can also prevent damage from hot cleaning tools or steam that might compromise the seal. Incorporating appropriate cleaning routines and understanding the surface material can ensure long-term protection of sealed surfaces.
Use Gentle Cleaners
Since sealed surfaces are designed to protect the material beneath, using gentle cleaners is essential to maintain that barrier. Harsh chemicals can break down the seal and cause damage over time. To keep your surfaces in prime condition, consider these tips:
- Use pH-neutral cleaners that are specifically formulated for sealed surfaces.
- Avoid abrasive scrubbers, which can scratch the seal and compromise protection.
- Test any new cleaner on a small, inconspicuous area before full application to ensure compatibility.
- Regular maintenance with appropriate cleaners helps preserve the natural beauty and longevity of sealed surfaces Free Floating.
Sticking to gentle, non-abrasive products helps preserve the integrity of the seal, extending its lifespan and keeping your surfaces looking their best. Always opt for mild solutions that clean effectively without risking damage.
Avoid Harsh Chemicals
When cleaning sealed surfaces, it’s essential to avoid harsh chemicals that can damage the protective layer. Strong acids, bleach, and abrasive cleaners may seem effective but can erode the seal, leading to dullness or permanent damage. Instead, opt for pH-neutral cleaners specifically designed for sealed surfaces. Always read labels carefully to guarantee the product is safe for your sealant. If you’re unsure, test a small, inconspicuous area first. Using harsh chemicals can compromise the surface’s durability and appearance, so it’s best to stick with gentle, non-abrasive solutions. Additionally, choosing products that are safe for sealed surfaces can prolong the lifespan of your surface’s protective layer. Being aware of proper cleaning techniques helps prevent accidental damage and maintain the surface’s original shine. Incorporating auditory processing awareness into cleaning routines can also help identify any signs of surface wear early on. Regularly inspecting your surfaces for surface wear indicators can help catch issues before they become costly repairs.
Test Before Applying
Before applying any cleaner to a sealed surface, testing a small, hidden area helps prevent potential damage. This simple step guarantees the cleaner won’t cause discoloration, dullness, or deterioration. To perform an effective test:
- Apply a small amount of the cleaner to an inconspicuous section.
- Wait 10-15 minutes to observe any changes in appearance or texture.
- Rinse thoroughly and check for any adverse reactions before proceeding.
Tips for Caring for Unsealed Surfaces
Unsealed surfaces require regular care to maintain their appearance and durability. To keep them in top shape, clean spills immediately to prevent staining. Use a soft broom or vacuum to remove dirt and debris regularly, avoiding abrasive tools that can scratch the surface. When cleaning, opt for a pH-neutral cleaner or a gentle soap mixed with water; harsh chemicals can damage unsealed materials. Avoid using excessive water, as too much moisture can seep in and cause deterioration. Consider applying a protective sealant or conditioner periodically to help repel moisture and dirt, but always test first to ensure compatibility. In addition, choosing appropriate cleaning techniques can help preserve the surface over time. In the end, place mats or rugs in high-traffic areas to reduce wear and tear, preserving the natural beauty of your unsealed surface. For optimal longevity, be mindful of surface sealing and proper maintenance techniques to prevent damage over time.
Common Mistakes to Avoid When Testing and Cleaning
One common mistake is using harsh or abrasive cleaning tools that can scratch or damage the surface. This can compromise the integrity of both sealed and unsealed surfaces. To avoid mistakes, keep these points in mind:
- Skipping a patch test before cleaning to ensure the cleaner won’t cause discoloration or damage.
- Using too much cleaner or scrubbing too aggressively, which can wear down or harm the surface.
- Ignoring manufacturer instructions, leading to improper cleaning methods that may void warranties or cause long-term damage.
When to Re-Test and Maintain Your Surfaces
Regularly re-testing and maintaining your surfaces guarantees they stay in peak condition and retain their protective properties. You should re-test your surfaces every few months or after significant exposure to weather, spills, or heavy use. This proactive approach helps you identify any deterioration or loss of sealant, so you can address issues early. Keep an eye out for signs like dullness, staining, or water absorption, which indicate it’s time for maintenance. Re-application of sealant or protective coatings should be done as recommended by the product manufacturer, usually annually or biannually. Proper maintenance and timely re-sealing extend the lifespan of your surfaces and prevent costly repairs. Consistent maintenance ensures your surfaces remain durable, resistant to damage, and looking their best. Staying proactive with re-testing and upkeep saves you money and effort in the long run. Additionally, understanding surface types helps you choose the appropriate re-sealing products and techniques. To ensure ongoing protection, consider water-resistant coatings that can enhance the durability of your surfaces against moisture and weathering. Incorporating surface testing methods can further optimize your maintenance routine and prevent future issues.
Frequently Asked Questions
Can the Water Test Damage Delicate Surfaces?
Yes, the water test can damage delicate surfaces if not done carefully. If you pour too much water or leave it on for too long, it can cause staining, warping, or other damage. To avoid this, use a small amount of water and quickly blot it with a cloth. Always test gently, especially on fragile or unsealed surfaces, to prevent any harm.
How Often Should I Perform the Water Test?
You should perform the water test every few months, like checking the pulse of your surface’s health. Regular testing guarantees your delicate surfaces stay safe from damage, acting as a shield against harmful cleaners. If water beads up, your surface’s sealed; if it seeps in, it’s unsealed. Keep this routine steady, and you’ll protect your surfaces like a vigilant guardian, preventing costly repairs down the line.
What Are Alternative Tests if Water Test Is Inconclusive?
If the water test is inconclusive, try the tape test by placing clear tape on the surface and pulling it off gently. If dirt or residue sticks to the tape, the surface is likely unsealed. Alternatively, perform a small, discreet patch test with a mild cleaner to see if the surface reacts or absorbs. These methods give you a clearer idea of whether your surface is sealed or unsealed before cleaning.
Does Sealing Affect the Longevity of Surfaces?
Sealing can greatly extend the lifespan of your surfaces by protecting them from moisture, stains, and wear. When you seal, you create a barrier that reduces damage from spills and daily use, helping surfaces stay in good condition longer. Proper sealing prevents cracks, warping, and discoloration, ultimately saving you money on repairs or replacements. Keep your surfaces sealed and well-maintained to guarantee they remain durable and attractive over time.
Are There Specific Cleaners Recommended for Sealed Vs Unsealed Surfaces?
Yes, there are specific cleaners recommended for sealed and unsealed surfaces. You should use gentle, pH-neutral cleaners on sealed surfaces to protect the sealant, avoiding harsh chemicals that can degrade it. For unsealed surfaces, opt for mild cleaners that won’t damage the material. Always check the manufacturer’s instructions before cleaning, and test any new product on a small, hidden area to verify compatibility.
Conclusion
Before you grab that cleaner, take a moment to perform the water test. Picture your surface as a silent guardian, either sealed tight like a shield or porous as an open book. Knowing which it is assists you in avoiding damage, protect its beauty, and ensure your space shines. With this simple test, you’ll steer clear of mistakes, keeping your surfaces pristine and vibrant—like a fresh coat of polish on a well-loved treasure.